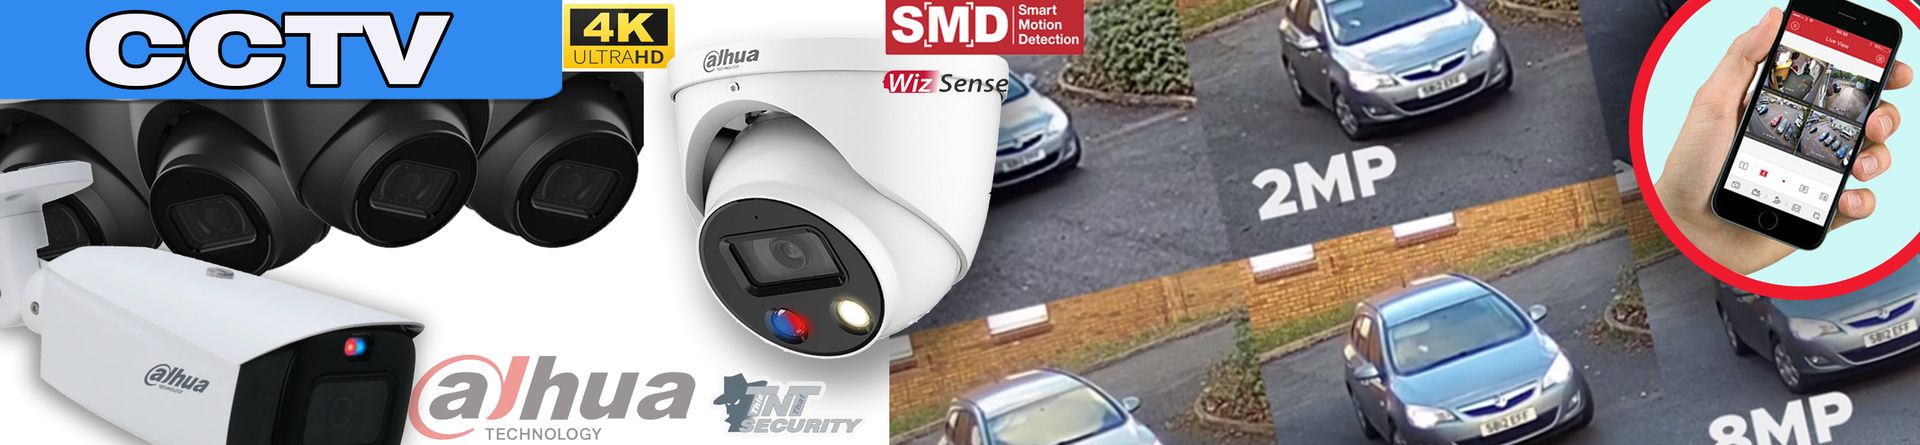
Installing a CCTV system is usually (but not always) easier on a single storey property. We can often hit a snag or find obstacles that simply delay the installation long enough to make it difficult to finish in the time planned so, in order to avoid disappointment, be prepared to have the installation take a little longer than expected. It may not be the case with your installation but its probably good information in case you need to be prepared for it.
The time it will take, will usually depend on a few common factors and then there is the design & build of the property which can sometimes add to the challenge as every property is unique.
Single Storey CCTV:
A single storey property usually means that options for pulling cable (eg. pulling cable up/down the walls or through a roof) is potentially easier than what might be the case when compared with a double storey property (or otherwise at heights that require longer ladders or elevated platforms to access the roof or point of installation for a camera or camera bracket).
It's not always the case but as a general guide, you can assume that the installation of any device/s on a single storey property with a tile roof is not going to be as difficult as it would be for a two storey property.
How long will it take?
Provided we don't run into any unforeseeable obstacles (blockages in walls, very tight roof area or crawl space below the house for example) then it should be a straight forward installation and we estimate that with one installer it will take approximately 90 mins per camera. This is a generous estimate however the time can be affected by other factors to either increase the time or sometimes even speed things up depending on the circumstances.
Time estimates:
Tile roof: between 60 - 90 Mins per camera for an average sized house (standard brick veneer 3 bedroom).
One installer.
Tin Roof: Add about 30 minutes per camera. A tin roof can usually makes it more difficult to install cables where a tile roof allows us to remove the tile to access the roof area. Hot days are no fun in a tiled roof so you can imagine on a hot day in a tin roof.
Other things to consider click here
Not enough info? let us know in the blog post comments click here
Double Storey CCTV:
A two storey storey property (or multi-level) usually means that access to the various intended cable pathways (eg. pulling cable up/down the walls or through a roof) is potentially more difficult than with a single storey property, and in most cases it is not possible to install a cable between floor levels without using conduit/ducts.
If you have a limited budget then most often conduit is the quickest solution but if you're happy to spend a little more then we can discuss what could be possible - of course we need to see the house to see where and how to run the cable and what other options may be possible.
It's not always the case but as a general guide, you can assume that the installation of any devices on a double storey property with a tile roof is going to be more work and more time consuming.
Avoiding conduit:
If you really don't want to use conduit then it could further increase costs as we need to find a way to install the cable without it.
How to keep costs down:
- Keep the location of the recorder and the cameras all on the same level.
This there is no need to go between levels, hence no need for conduit in most (if not all) cases. Hopefully the internet is also available on the same level but if not then you can possibly use a WiFi range extender to get the internet where it needs to be. As WiFi is not as stable as cables internet, we would always aim to have a cable from point to point. - You can also consider avoiding the use of camera mounts where possible. This may not be advisable as sometimes a camera mount is necessary and unavoidable (where at other times it may be preferred cosmetically). If your property has eaves then use the eaves for camera locations - provided they capture what you need.
How long will it take?
Provided we don't run into any unforeseeable obstacles (blockages in walls, very tight roof area or crawl space for example) then it should be a straight forward installation and we generously estimate that with one installer it will take approximately 90-120 Mins per camera. This is a generous estimate however the time can be affected by other factors to either increase the time or sometimes even speed things up depending on the circumstances.
Time estimate:
Tile roof: between 90 - 120 Mins per camera for an average sized double storey house (standard brick veneer 4 - 5 bedroom).
One installer.
Tin Roof: Add about 30 minutes per camera
Other things to consider click here
Not enough info? let us know in the blog post comments click here
Commercial Properties CCTV:

Depending on the scale of the job and what your actual requirements are, installation can be either really easy or really difficult …or somewhere in between. The only real way to tell is for an installer to see the property and discuss your requirements and possible options.
How to keep costs down:
- Clear floor spaces and Access to areas we need to get to.
Usually larger commercial properties that are already established can have access difficulties. There may be machinery or other permanent structures blocking access to where a ladder needs to be placed. - Got your own EWP?
To overcome access difficulties, whether it be height issue or needing extended reach over cluttered floor space, we may need to include a cost for an elevated work platform (eg. scissor-lift or cherry picker / boom-lift). This adds a hefty cost usually but if you can organize your own then it'll potentially save you hundreds if not thousands (depending on time frame).
How long will it take?
As one commercial property's needs vary greatly from another this is not something that can be determined without a visit to the site or detailed information about the property. In time we will try to add examples of work done in the past to give some idea as to how long it might take for your property.
Other things to consider click here
Not enough info? let us know in the blog post comments click here
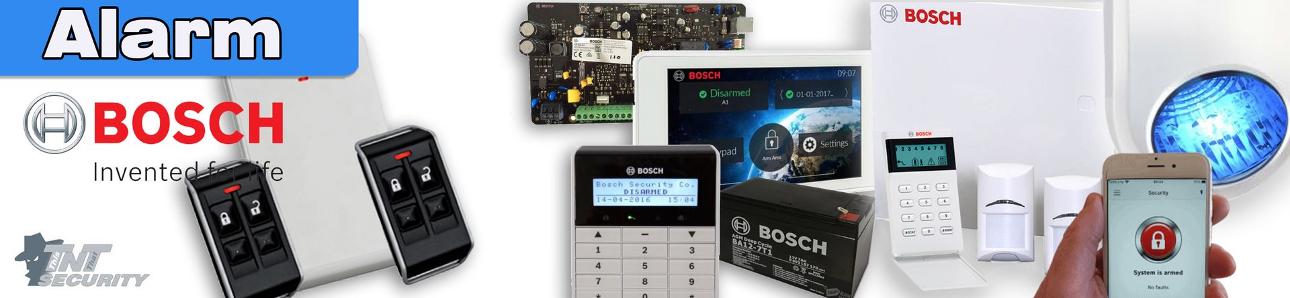
Installing an alarm system is usually (but not always) easier on a single storey property. We can often hit a snag or find obstacles that simply delay the installation long enough to make it difficult to finish in the time planned so, in order to avoid disappointment, be prepared to have the installation take a little longer than expected. It may not be the case with your installation but its probably good information in case you need to be prepared for it.
The time it will take, will usually depend on a few common factors and then there is the design & build of the property which can sometimes add to the challenge as every property is unique.
Single Storey Alarm:
A single storey property usually means that options for pulling cable (eg. pulling cable up/down the walls or through a roof) is potentially easier than what might be the case when compared with a double storey property (or otherwise at heights that require longer ladders or elevated platforms to access the roof or point of installation for a sensor or siren etc).
It's not always the case but as a general guide, you can assume that the installation of any device/s on a single storey property with a tile roof is not going to be as difficult as it would be for a two storey property.
How long will it take?
Provided we don't run into any unforeseeable obstacles (blockages in walls, very tight roof area or crawl space below the house for example) then it should be a straight forward installation and we estimate that with one installer it will take approximately 90 mins per cable - this estimate includes installing the cable, the device and wiring at the panel and then finally configuring the panel to preferred settings.
This is a generous estimate however the time can be affected by other factors to either increase the time or sometimes even speed things up depending on the circumstances.
Time estimates:
Tile roof: between 60 - 90 mins per cable for an average sized house (standard brick veneer 3 bedroom).
One installer.
Tin Roof: Add about 30 mins per cable. A tin roof can usually makes it more difficult to install cables where a tile roof allows us to remove the tile to access the roof area. Hot days are no fun in a tiled roof so you can imagine on a hot day in a tin roof slows things down a little too.
How many cables will I need?
Pretty much one cable per device that is connected to the main alarm panel.
These typically include the following:
- Sensors/detectors (1 cable each so if you have 4 sensors then = 4 cables)
- Reeds (if used)
- Other wired sensors (like glass shattering detectors or 360 detectors, smoke detectors etc)
- Keypad
- Internal siren
- External Siren/strobe
- WiFi Receivers (depending on the device and proximity this is usually not included in the count unless it's located more than a metre from the main alarm panel.)
- Internet cable (if there is not already a data/internet port available close to the alarm panel)
Other things to consider click here
Not enough info? let us know in the blog post comments click here
Double Storey Alarm:
A two storey storey property (or multi-level) usually means that access to the various intended cable pathways (eg. pulling cable up/down the walls or through a roof) is potentially more difficult than with a single storey property, and in most cases it is not possible to install a cable between floor levels without using conduit/ducts.
In some two storey properties we may be very lucky to find a cable path from the second storey to the ground floor and without the need for conduit. It's highly unlikely though, and the best option for a new alarm in a two storey property is to install whatever we can with wired options upstairs and then anything downstairs it's best to use wireless devices operating via a WiFi transmitter. This includes various wireless sensors with 5 yr battery life and remote key fobs. If you opt for a bosch 6000 alarm then you can also include a WiFi keypad if you prefer to have the keypad downstairs (where its not possible to run a cable).
It's not always the case but as a general guide, you can assume that the installation of any devices on a double storey property with a tile roof, is going to be more work and more time consuming than a single storey property.
How long will it take?
Provided we don't run into any unforeseeable obstacles (blockages in walls, very tight roof area or crawl space below the house for example) then it should be a straight forward installation and we estimate that with one installer it will take approximately 90 mins per cable - this estimate includes installing the cable, the device and wiring at the panel and then finally configuring the panel to preferred settings. WiFi Devices are less time consuming but to be safe expect about 30 minutes per WiFi device, including determining correct location, installing, activating and testing. Finally configuring with the keypad at the end.
This estimate also allows for potential hurdles that tend to find a way into the days work often.
This is a generous estimate however the time can be affected by other factors to either increase the time or sometimes even speed things up depending on the circumstances.
Time estimate:
Tile roof: between 60 - 90 mins per cable for an average sized house (standard brick veneer 3 bedroom). About 30 minutes per WiFi device.
One installer.
Tin Roof: Add about 30 mins per cable. A tin roof can usually makes it more difficult to install cables where a tile roof allows us to remove the tile to access the roof area. Hot days are no fun in a tiled roof so you can imagine on a hot day in a tin roof slows things down a little too.
How many cables will I need?
Pretty much one cable per device that is connected to the main alarm panel directly (not including WiFi devices).
These typically include the following:
- Sensors/detectors (1 cable each so if you have 4 sensors then = 4 cables)
- Reeds (if used)
- Other wired sensors (like glass shattering detectors or 360 detectors, smoke detectors etc)
- Keypad
- Internal siren
- External Siren/strobe
- WiFi Receivers (depending on the device and proximity this is usually not included in the count unless it's located more than a metre from the main alarm panel.)
- Internet cable (if there is not already a data/internet port available close to the alarm panel)
Other things to consider click here
Not enough info? let us know in the blog post comments click here
Commercial Properties Alarm:
Depending on the scale of the job and what your actual requirements are, installation can be either really easy or really difficult …or somewhere in between. The only real way to tell is for an installer to see the property and discuss your requirements and possible options.
How to keep costs down:
- Clear floor spaces and Access to areas we need to get to.
Usually larger commercial properties that are already established can have access difficulties. There may be machinery or other permanent structures blocking access to where a ladder needs to be placed. - Got your own EWP?
To overcome access difficulties, whether it be height issue or needing extended reach over cluttered floor space, we may need to include a cost for an elevated work platform (eg. scissor-lift or cherry picker / boom-lift). This adds a hefty cost usually but if you can organize your own then it'll potentially save you hundreds if not thousands (depending on time frame).
How long will it take?
As one commercial property's needs vary greatly from another this is not something that can be determined without a visit to the site or detailed information about the property. In time we will try to add examples of work done in the past to give some idea as to how long it might take for your property.
Other things to consider click here
Not enough info? let us know in the blog post comments click here
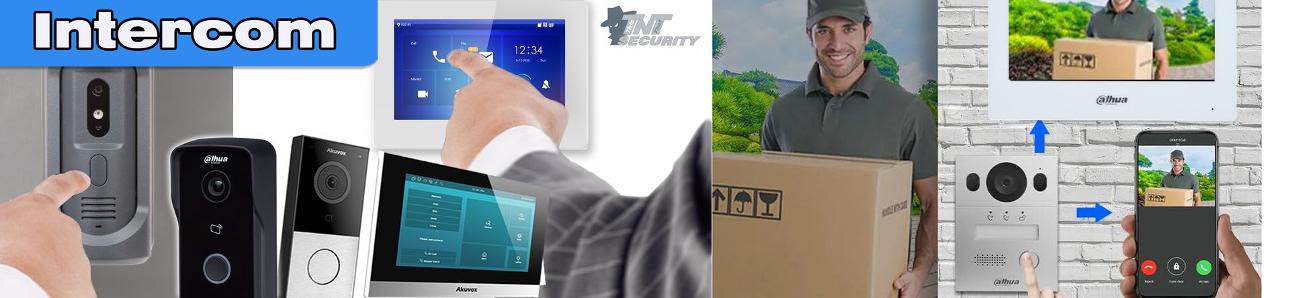
Installing an intercom system is usually (but not always) easier on a single storey property. We can often hit a snag or find obstacles that simply delay the installation long enough to make it difficult to finish in the time planned so, in order to avoid disappointment, be prepared in case the installation takes a little longer than expected. It may not be the case with your installation but its probably good information in case you need to be prepared for it.
The time it will take, will usually depend on a few common factors and then there is the design & build of the property which can sometimes add to the challenge as every property is unique.
Single Storey Intercom:
A single storey property usually means that options for pulling cable (eg. pulling cable up/down the walls or through a roof) is potentially easier than what might be the case when compared with a double storey property (or otherwise at heights that require longer ladders or elevated platforms to access the roof or point of installation for a sensor or siren etc).
It's not always the case but as a general guide, you can assume that the installation of any device/s on a single storey property with a tile roof is not going to be as difficult as it would be for a two storey property.
How long will it take?
Provided we don't run into any unforeseeable obstacles (blockages in walls, very tight roof area or crawl space below the house for example) then it should be a straight forward installation and we estimate that with one installer it will take approximately 90 mins per cable - this estimate includes installing the cable, the device and wiring at the panel and then finally configuring the panel to preferred settings.
This is a generous estimate however the time can be affected by other factors to either increase the time or sometimes even speed things up depending on the circumstances.
Time estimates:
Tile roof: between 60 - 90 mins per cable for an average sized house (standard brick veneer 3 bedroom).
One installer.
Tin Roof: Add about 30 mins per cable. A tin roof can usually makes it more difficult to install cables where a tile roof allows us to remove the tile to access the roof area. Hot days are no fun in a tiled roof so you can imagine on a hot day in a tin roof slows things down a little too.
How many cables will I need?
Most kits comprise of 3 devices so one cable per device including internet connection.
Pretty much one cable per device that is connected to the central switch pus internet if required.
These typically include the following:
For common IP kits:
- Monitor (usually only one but sometimes two or more)
- Door station OR door bell (usually only one but sometimes two or more)
- Internet cable (if there is not already a data/internet port available close to the switch then we need to install it from the router or an internet point to the switch)
For 2-wire kits:
- Monitor (usually only one but sometimes two)
- Door station OR door bell (usually only one but sometimes two)
Other things to consider click here
Not enough info? let us know in the blog post comments click here
Double Storey Intercom:
A two storey storey property (or multi-level) usually means that access to the various intended cable pathways (eg. pulling cable up/down the walls or through a roof) is potentially more difficult than with a single storey property, and in most cases it is not possible to install a cable between floor levels without using conduit/ducts.
In some two storey properties we may be very lucky to find a cable path from the second storey to the ground floor and without the need for conduit. It's highly unlikely though, and the best option for a new intercom in a two storey property is to use a wireless option OR conduit or square duct as discreetly as possible. If your budget allows it then other options may be available but that would need to be determined by a visit by an installer.
It's not always the case but as a general guide, you can assume that the installation of any devices on a double storey property with a tile roof, is going to be more work and more time consuming than a single storey property.
How long will it take?
Its not something that is easy to say since we have to determine the location of the monitor and also the capability to have it wired or perhaps opt for a wireless model.
If your property resembles the scenario similar to a single storey property where we have roof access over the location of the door and somehow a path to the area of the monitor then there's a chance it can be done in a similar time frame as a single storey property so it might be as quick as a couple hours but most two storey properties present difficult scenarios for running cables on lower levels. Its best to have an installer visit and have a look.
Other things to consider click here
Not enough info? let us know in the blog post comments click here
Commercial Properties Alarm:
Depending on the scale of the job and what your actual requirements are, installation can be either really easy or really difficult …or somewhere in between. The only real way to tell is for an installer to see the property and discuss your requirements and possible options.
How to keep costs down:
- Clear floor spaces and Access to areas we need to get to.
Usually larger commercial properties that are already established can have access difficulties. There may be machinery or other permanent structures blocking access to where a ladder needs to be placed. - Got your own EWP?
To overcome access difficulties, whether it be height issue or needing extended reach over cluttered floor space, we may need to include a cost for an elevated work platform (eg. scissor-lift or cherry picker / boom-lift). This adds a hefty cost usually but if you can organize your own then it'll potentially save you hundreds if not thousands (depending on time frame).
How long will it take?
As one commercial property's needs vary greatly from another this is not something that can be determined without a visit to the site or detailed information about the property. In time we will try to add examples of work done in the past to give some idea as to how long it might take for your property.
Other things to consider click here
Not enough info? let us know in the blog post comments click here
Other things to consider:
- You may need to add one or more brackets (camera mounts) to your installation:
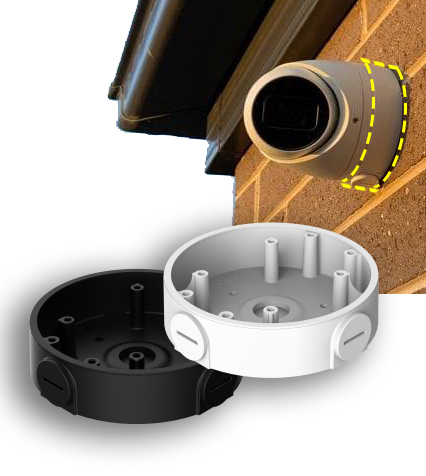
The preferred location for a camera may require a camera bracket/mount to be installed. eg. If the camera is to be fixed to a solid concrete or brick surface then it may need to either have a larger hole drilled for the cable OR a camera bracket fitted first. A camera bracket houses the bundled cable which is usually pushed back into the cavity where a cavity exists. Drilling through concrete and brick is more difficult than plaster and not as easy to repair if it blows out so for this reason you might prefer to opt for a camera bracket instead.
- The location of the recorder and Internet:
If the recorder is far from an internet access point or modem/router, you might need to have an additional internet cable installed in order to connect the recorder to the internet. This connection allows you to access the mobile APP on your mobile device.
Some customers will instruct us to put the recorder next to the modem even if this goes against our advice (depending on where the modem is). You can save some money by doing this but it is advised that a recorder is installed in a location where an intruder will not find it easily, and then have a cable installed properly from the recorder to the internet modem (or an active switch if available). - Weather
Obviously rain can make it dangerous to work on rooves or ladders and even heat can make it pretty hard going and slow down the installation process. - The start time
For any installation its obviously going to be completed later if we start later. Also starting later could mean that we need to return an additional day which, in turn means additional charges. Its best to have the installer there early on the day of installation unless otherwise arranged or advised. - Solar Panels or other services on the roof
Even if you have a tiled roof, having solar panels can get in the way of accessing areas of the roof easily and would require we enter via the manhole. This would only be of real concern if the roof space was crowded with ducts and other obstacles and especially so if in addition to that it was tight. This makes crawling in roof spaces very hard and time consuming but still necessary. - Access
This is usually only a concern for commercial properties however in rare circumstances it can be a concern for residential properties.
Are there any obstacles to impede access to the property with standard ladders?
Do you need an elevated work platform (eg. scissor-lift or cherry picker / boom-lift) in order to get to any particular area of your property without putting the installer in serious danger or risk of injury or death?
If an EWP is necessary and you are unable to arrange for one to be available then we can arrange it. Our installers are certified to operate elevated work platforms. The cost of hiring an EWP can be a significant daily cost and if required weekly usually it'll improve the daily rate but still in the hundreds or thousands on top of the cost of installation & equipment.
Not enough info? let us know in the blog post comments click here